If you want the best-looking paint job in Santa Clarita, the secret isn’t just picking a trendy color—it’s the prep. Careful surface prep sets the stage for smooth coverage, sharp lines, and paint that lasts through our hot summers, cooler nights, and those occasional Santa Ana winds. Below is a practical, step-by-step guide to preparing your home—inside and out—so your paint looks great and stays that way.
Why Prep Matters More Than Paint Brand
Paint can only perform as well as the surface beneath it. Dust, chalk, grease, mildew, and UV-damaged areas keep coatings from bonding tightly. In our local climate, that can lead to peeling, fading, and premature touch-ups. Good prep:
- Improves adhesion so the paint actually sticks
- Levels texture for a cleaner, higher-end finish
- Extends durability, saving you money on future repaints
- Protects trim and hardware, preventing messes and scratches
If you decide you’d rather have a local team handle everything—prep to final walk-through—consider calling professional painters in Santa Clarita from New Life Painting.
Exterior: The Santa Clarita-Specific Prep Checklist
1) Wash away chalk and dust
Exterior paint often develops a powdery “chalk.” A thorough wash removes dirt, cobwebs, and airborne particulates that gather near eaves and stucco textures.
- Use a low-pressure rinse to prevent water from entering stucco cracks.
- Add a mild exterior cleaner to break down grime.
- Rinse from top to bottom for a uniform, spot-free surface.
Pro tip: After drying, rub your hand lightly across the wall. If a white residue comes off, wash again or spot-treat chalky areas.
2) Tackle mildew and algae early
Shaded sides of homes—especially near landscaping—can grow mildew. Treat with a mildew-removing cleaner and scrub gently with a soft brush. Rinse thoroughly. Painting over growth traps moisture, leading to peeling.
3) Repair stucco and siding
Cracks and holes allow moisture to seep in and damage paint from the inside out.
- Stucco: Use an exterior patch to blend the texture with the surrounding areas.
- Wood siding: Replace rotted boards. If the wood is sound, fill minor defects with an exterior filler and sand smooth.
- Fiber-cement or composite: Clean, dry, and fill gaps; follow the manufacturer’s prep guidance.
4) Scrape, sand, and feather edges
Loose paint creates weak spots. Scrape until you reach a sound, firmly attached coating, then feather the edges with sandpaper for a smooth transition. On wood, sand with the grain to avoid visible scratches under the new finish.
5) Caulk for clean lines and weather defense
Use a high-quality, paintable exterior caulk to seal gaps around windows, doors, trim, and where different materials meet. This keeps out water and gives you those crisp, shadow-free joints. Don’t caulk weep holes or places designed for ventilation.
6) Prime the right areas
Spot-prime any bare wood, patched stucco, or stained surfaces. A bonding or stain-blocking primer creates a uniform base, improves coverage, and helps keep tannins or discoloration from bleeding through.
7) Protect landscaping and fixtures
Mask light fixtures, hose bibs, and address numbers. Drape plants lightly to protect without trapping heat. Use breathable covers if temperatures climb—overheating shrubs can stress your landscape.
Interior: Prep for Clean Lines and Flawless Walls
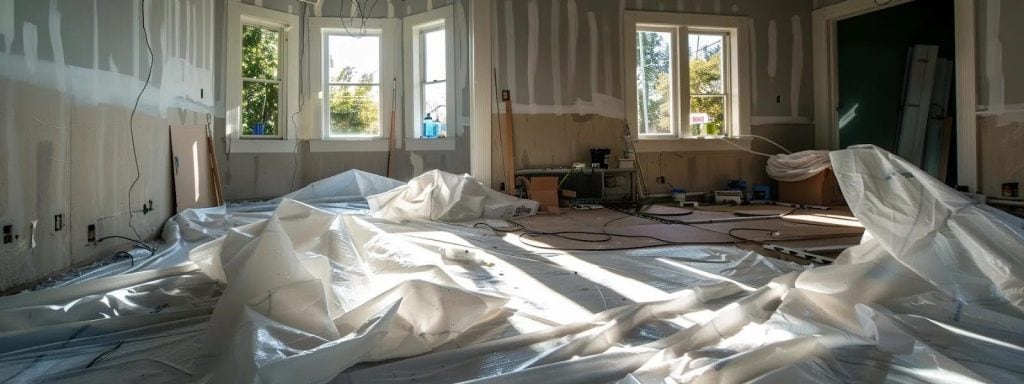
1) Clear and cover the space
Move furniture to the center of the room and cover it with clean, lint-free plastic or drop cloths. Tape off registers, outlets, and switches, and protect floors with rosin paper or heavy canvas.
2) Degloss and de-grease high-touch areas
Kitchens, hallways, and kids’ rooms collect oils that repel paint. Wipe walls with a mild degreaser; rinse with clean water. On glossy trim or doors, a light scuff-sand helps paint grab and reduces flashing.
3) Patch, fill, and sand smooth
- Nail holes & dings: Use a lightweight spackle; sand flush when dry.
- Cracks at seams: Cut a shallow “V,” fill with flexible filler, and sand.
- Texture Match: If your walls have an orange-peel or knockdown texture, use a matching spray texture before priming.
4) Address stains and problem spots
Water marks, smoke residue, or ink require a stain-blocking primer. Skipping this step lets stains telegraph through your fresh topcoat.
5) Prime strategically
- New drywall → PVA primer
- Bare wood or patched spots → bonding primer
- High-moisture rooms (bath/laundry) → Mildew-resistant primer
6) Mask for razor-sharp lines
Use low-tack painter’s tape along baseboards, casings, and ceiling lines. Press edges firmly with a putty knife for bleed-resistant lines. Remove the tape while the final coat is slightly tacky to achieve the cleanest edge.
Cabinets: Prep That Makes a Night-and-Day Difference
Cabinets are handled more than walls, so prep is everything.
- Clean thoroughly: Remove grease and residue with a cabinet-safe cleaner.
- Label hardware & doors: Keep hinges, screws, and doors organized.
- Scuff-sand: A light sanding gives the primer something to bite.
- Prime for adhesion: Use a high-adhesion primer made for slick surfaces.
- Dust control: Vacuum and use a tack cloth before every coat.
Want help transforming your kitchen or bath? Our cabinet painting service pairs meticulous preparation with smooth, durable finishes that withstand daily use.
Timing Your Project Around Santa Clarita Weather
Our area sees hot afternoons and cooler evenings, which can affect cure times.
- Exterior: Aim for days between 50–85°F with low wind. Start mid-morning so surfaces dry after any overnight moisture and avoid the late-day heat.
- Interior: Keep rooms ventilated but dust-free. Maintain a stable temperature and humidity to ensure even drying.
- Avoid rushing the cure: Even when paint feels dry to the touch, it can take several days to fully cure, especially on doors and cabinets that are frequently handled.
Materials & Tools: A Short, Smart Shopping List
- Cleaners: Mild exterior wash, mildew remover, interior degreaser
- Patching: Exterior filler, spackle, wood repair epoxy (for small areas), stucco patch
- Sanding: Assorted grits (80–220), sanding sponges, pole sander
- Masking: Quality painter’s tape, plastic, canvas drop cloths
- Primers: Bonding, stain-blocking, PVA for new drywall
- Caulks: Paintable, flexible exterior caulk; small bead control
- Safety: Eye protection, N95 for sanding dust, gloves
- Application: Angled sash brushes, 3/8″–1/2″ nap rollers (walls), fine-finish rollers (cabinets), extension pole
The “Prep Before Paint” Game Plan (Quick Sequence)
- Wash/clean surfaces
- Remove loose paint; scrape and feather edges.
- Repair (stucco, wood, drywall)
- Sand and dust off
- Caulk gaps
- Prime bare or patched areas
- Mask trim, glass, floors, and fixtures
- Stage tools and mix paint thoroughly
- Cut in the edges, then roll the top to the bottom.
- De-mask carefully for clean lines
Santa Clarita Exterior Surfaces: Special Notes
Stucco
- Wash gently; avoid forcing water into hairline cracks.
- Patch with stucco-specific filler; texture to blend.
- Prime patched zones to equalize porosity and prevent flashing.
Wood Trim & Fascia
- Look for sun-baked areas where paint is brittle.
- Sand until smooth; spot-prime bare wood to prevent tannin bleeding.
- Caulk miter joints and end grain to prevent water from entering.
Metal Railings & Gates
- Wire-brush rust; treat with a rust-inhibitive primer.
- Keep coats thin to maintain the metal’s crisp profile.
Interior Surfaces: Special Notes
Bathrooms & Laundry Rooms
- Ventilate well and prime with mildew-resistant products.
- Seal around tubs and backsplashes with paintable caulk for a tight finish.
Kitchens
- Extra degreasing on backsplashes, cooktop walls, and cabinet doors.
- Prime to lock down stains and ensure uniform sheen.
High-Traffic Halls & Kids’ Rooms
- Repair scuffs and dents by applying a durable, washable topcoat after proper priming.
Color Testing: Avoid Surprises
Santa Clarita light shifts throughout the day. Test large swatches on both sun-exposed and shaded sides outdoors, as well as on multiple walls indoors. Check morning, midday, and evening to see how undertones change. A small investment in samples pays off with color confidence.
Keep It Clean: Dust and Debris Control
Dust is the enemy of smooth finishes.
- Seal doorways with zipper plastic when sanding.
- Vacuum sanding dust with a HEPA-capable vac.
- Tack-cloth before priming and between coats on cabinets and trim.
Safety & Set-Up Tips You’ll Be Glad You Followed
- Work from top to bottom (ceilings → walls → trim).
- Keep a damp washcloth handy for quick spills.
- Stir the paint thoroughly and strain if necessary for an ultra-smooth cabinet finish.
- Label cans with room/area, date, and color for easy touch-ups later.
DIY vs. Pro: When It Makes Sense to Call In Help
If your home needs carpentry repair, has failing coatings, or you’re on a tight timeline, hiring pros can actually save money by avoiding rework. New Life Painting’s local team handles washing, repairs, masking, priming, and those small details that create a polished result. If you want help, get started here: painters in Santa Clarita.
Key Benefits of Proper Paint Prep (Quick Table)
| Benefit | What It Means for Your Home | Why It Matters in Santa Clarita |
| Stronger adhesion | Paint bonds tightly to the surface | With heat swings, weak adhesion fails faster |
| Smoother finish | Fewer bumps and roller marks | Bright sunlight highlights surface flaws |
| Longer lifespan | Coatings last longer seasons | Less repainting saves time and money |
| Cleaner lines | Tape and caulk create sharp edges | Adds curb appeal that you can see from the street |
| Moisture defense | Caulk and primer block water intrusion | Protects stucco and wood from damage |
Troubleshooting: Fix It Before You Paint
- Peeling on sun-facing walls: Strip loose paint, sand smooth, and prime with a bonding primer before repainting.
- Glossy trim won’t cover: Scuff-sand, then use a high-adhesion primer to prevent tackiness and peeling.
- Cabinet grain showing too much: Fill grain (if desired) and sand progressively before priming; multiple thin coats are better than one heavy coat.
- Tape bleed: Press the edges firmly; switch to a tape rated for your wall texture and remove it while still tacky.
After the Paint: Let It Cure the Right Way
- Avoid washing freshly painted walls for at least 2–3 weeks.
- For cabinets and doors, be gentle for the first 7–10 days—full cure takes longer than when they are “dry to the touch.”
- Keep rooms ventilated to clear any new-paint scent faster.
Ready to Paint Without the Headaches?
If you prefer a start-to-finish approach that handles preparation, protection, and painting, New Life Painting is a local, careful company focused on durable results. Learn more or request an estimate from our Santa Clarita team here: professional painters in Santa Clarita.
FAQs
1) What’s the most important prep step for exteriors in Santa Clarita?
Washing and removing chalk is the number one priority. Without it, paint can’t grip, and you’ll see early peeling or uneven fade.
2) Do I have to prime everything?
No. Spot-prime bare wood, patched stucco, and stained areas. Full priming is smart for new drywall or when making a big color change.
3) How long should I wait between coats?
Follow the paint label’s instructions, but in warm, dry weather, allow 2–4 hours between coats on walls. Cabinets and trim may require longer drying times for a smooth finish.
4) Can I paint in peak summer heat?
Yes, but start earlier in the day and avoid direct afternoon sun on exteriors. Indoors, keep the HVAC running to maintain a steady, comfortable temperature.
5) What if I find peeling on fascia boards?
Scrape to a firm edge, sand, and prime with a bonding primer. If the wood is soft or rotten, replace that section before painting.